

This image is generated using Dall-EPrompt: Generate an image of a phone on which the top side of the screen contains UI elements and the bottom of the screen contains code in a minimalistic flat style
In our previous post we’ve built a basic Android application that can display Hello World. In some cases this might just be the app you’re looking for, but generally speaking you’d want an app that executes some kind of logic.
If we look at the MainActivity.kt file we see that we directly call UI elements, this is not the way we actually want to build our entire application. If we choose to keep the UI and the logic in the same file, we can’t run a unit test to test our logic, we’d need an Android UI test for that. This is possible, but I’d strongly advise against it. To solve this problem, we can use ViewModels.
Add a dependency
Before we get started by creating a view model, we’re going to need an extra dependency which will allow us to couple our own view model to the Android lifecycle automatically. This means that our view model won’t go out of scope until the view model owner goes out of scope (Google, 2024).
Add the lifecycle-viewmodel-compose dependency to the build.gradle.kts file in the app module.
1
2
3
4
5
6
7
dependencies {
    // ...

    implementation("androidx.lifecycle:lifecycle-viewmodel-compose")

    // ...
}
Create the view model
For our small use case, we’ll be building an application that displays Hello World, but when you click on the text, it changes to Hello again. This is a fairly small change as to what we had, but it gives us a little bit of insights in how we can update the UI from the view model.
Let’s first start by creating a new file in our app module called MainViewModel.kt. And give it the following contents`
1
2
3
4
5
6
7
8
9
10
package net.bartkessels.myapplication

import androidx.lifecycle.ViewModel
import kotlinx.coroutines.flow.MutableStateFlow
import kotlinx.coroutines.flow.asStateFlow

class MainViewModel: ViewModel() {
    private val _displayText = MutableStateFlow("Hello world")
    val displayText = _displayText.asStateFlow()
}
There are already a few things happening. First we inherit from the ViewModel class, this allows us to persis UI state and provide access to business logic (Google, 2023). We could also be using a regular class, but then we’d lose the aforementioned benefits.
Update the state flow
Next we have the _displayText and displayText members. These are both used to modify our UI. The _displayText is a backing field, which we’ll be using inside our view model to update the value. That’s why its modifier is set to private. The displayText member, is a public member which transforms the _displayText into a state flow. A state flow is an observable flow that emits the current and new updates to the listeners, also known as collectors (Google, 2023).
This means that our initialization of _displayText as a MutableStateFlow with a default value of Hello world, all listeners of the displayText state flow will get the value Hello world. As soon, as the _displayText value updates, the listeners of displayText will receive the new value that was given to _displayText.
Now that we have set up our state flow, let’s create a method that is able to update the value. This can be done by calling the update extension method on the _displayText MutableStateFlow member (Kotlin Foundation, n.d.).
1
2
3
4
5
6
7
8
9
10
11
12
// ...

class MainViewModel: ViewModel() {
    private val _displayText = MutableStateFlow("Hello world")
    val displayText = _displayText.asStateFlow()

    fun updateText() {
        _displayText.update {
            "Hello again!"
        }
    }
}
Create a new UI
In the previous post we’ve created a view inside an Activity. Because we’d like to seperate the logic from the UI, we’ll be creating a new file where our UI will live. You can split this up into multiple files when you need to, but for now we’ll be creating everything in the same file.
Create the file MainView.kt in the app module and give it the following contents.
1
2
3
4
5
6
7
8
9
10
11
12
13
// ...

@Composable
fun Main(
    viewModel: MainViewModel
) {
    BasicText(
        text = viewModel.displayText.collectAsState().value,
        modifier = Modifier.clickable(
            onClick = viewModel::updateText
        )
    )
}
The first that you might notice is the capitalization used for the Main method. Usually a function in Kotlin would begin with a lowercase letter, but for Composables the naming-convention is to use camel-case as opposed to Pascal case (JetPack Compose, 2021). This might take some time before you are used to this, at least it was for me, luckily Android Studio will give you warnings in the IDE when you don’t comply to the naming convention.
As a parameter to our Main method, we pass a reference to the MainViewModel because we’ll be needing two properties of that view model. Namely, the displayText member, and the updateText function because we need to display that information. Inside the Main function, we have the same BasicText element that we’ve had in our previous post. But now we set the text parameter to the displayText property of the view model. We call the collectAsState method on the displayText member. If we check out the documentation for collectAsState, we see that this method allows us to update the displayText member, and that the new value will automatically trigger a recomposition thus updating the UI to display the new value of the displayText member (Google, 2023). Because the collectAsState returns a StateFlow<string> we call the value property to get the actual string value of the displayText member.
Another thing, that has changed since our previous implementation of the Hello world BasicText is the modifier parameter. A modifier is used to set multiple elements to decorate or add behaviour to a Compose element. Important is that the order of these elements can change the behaviour or layout of the component because they are applied in order (Google, 2024). The clickable modifier we’ve added allows us to execute a method when a user presses the element this modifier is placed upon (Google, 2024). Because the clickable lambda does not have any parameters, we can pass the viewModel::updateText method reference immediately instead of executing the method in the lambda call. If we needed to this, the code would look as follows.
1
2
3
4
5
// ...
modifier = Modifier.clickable {
    viewModel.updateText()
}
// ...
Update the MainActivity
Now that we have set up our view model, and properly decouple our UI from the logic, it’s time to wire it all together. We’ll be updating our original MainActivity.kt onCreate method by replacing the BasicText element inside the setContent lambda with a call to our own Composable Main.
Update the onCreate method with the following contents.
1
2
3
4
5
6
7
8
9
10
// ...

override fun onCreate(savedInstanceState: Bundle?) {
    super.onCreate(savedInstanceState)
    val viewModel: MainViewModel by viewModel()

    setContent {
        Main(viewModel)
    }
}
What has changed is that we instantiate our new view model and pass it into the call to our Main composable inside the setContent lambda. This will display our own composable with a reference to our view model making it functionally the same as before, but allows for separation of concerns just like we want to.
You might notice that we instantiate the MainViewModel using a delegate viewModel interface instead of just calling the constructor using MainViewModel(). This is a method that will either return an existing instance of the view model we specify using generics or will instantiate a new instance (Google, 2024).
Run the application
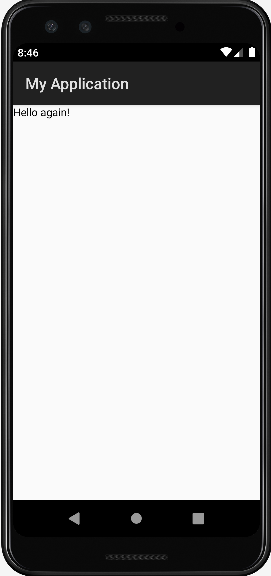
Now that everything is configured, we can run our own application. The only thing you’ll see is a white screen with the text Hello World!. And if you click the text, you’ll see that it updates to Hello again!. For now, our application looks pretty boring, but in the upcoming blog post we’ll be adding the Android Material Theme.
- The entire application can be found on github.com/bartkessels/basic-android-app
- Just the code that’s been created in this post can be found in the tutorial/set-up-view-models branch
Categories
Related articles

Set up Jetpack Compose
In Android development, the new standard for building UI's is Jetpack Compose. But how do you actually set ...

Set up Material Design with Jetpack Compose
You've just set up Jetpack Compose, and now you want to make your app look like a native Android app. This ...

Support multiple languages in your app
The user base for your application includes multiple nationalities, so why don't you update your app to all...

Enable UI preview in Android Studio
When developing an Android app, you're likely to iterate through multiple UIs. When going through this proc...