

This image is generated using Dall-EPrompt: Generate an image of a phone with a bit of code being displayed behind the Android logo in a minimalistic flat style
Now that we have our base project set up, let’s add an activity with a view, so we can see our own application. When building Android application in this time and age, it’s pretty assumable that you’re going to use Jetpack Compose for your UI, since it’s also the recommended toolkit by Google (Google, n.d.).
Add Jetpack Compose
Inside our project structure we have two build.gradle.kts files. These files are used to build our app, and these include the dependencies that our app needs.
We have a top-level /build.gradle.kts files, this is useful when you have multiple modules inside your project. But, since we only have one module app we’ll be focussing on the project build.gradle.kts file which is located at /app/build.gradle.kts.
Enable Jetpack compose
Let’s start by enabling JetPack Compose under the android section in the app/build.gradle.kts file. Do this by adding the following contents in the android section and execute a gradle sync to implement the change to the project.
1
2
3
4
5
6
7
8
9
10
11
12
13
// ...
android {
    // ...
    buildFeatures {
        compose = true
    }

    composeOptions {
        kotlinCompilerExtensionVersion = "1.5.8"
    }
    // ...
}
// ...
Inside the android block, all the Android specific properties are defined (Google, 2024). However, for Jetpack compose we only need to set the buildFeatures and the composeOptions properties to enable Jetpack compose for Android (Google, 2024).
- The
buildFeaturesinterface includes a couple of properties, we only need thecomposeproperty to enable Jetpack Compose (Google, 2022). - The
composeOptionsis an interface for setting optional settings for Jetpack compose (Google, 2023). We’ll be setting thekotlinCompilerExtensionVersionto the Kotlin Compiler extension version we need. This version is based on the Kotlin compiler version you’re using, please check the Compose to Kotlin Compatibility Map.
Add dependencies
Now that our compiler is aware of the fact that we want to use Jetpack Compose, we need to add a couple of dependencies, so we can actually use Jetpack Compose components inside our application.
Luckily, Jetpack Compose uses a BOM to store all the versions that its libraries are using. This way, all the Jetpack Compose libraries we’ll be importing as dependencies will work together (Google, 2024).
Let’s add the BOM dependencies inside the dependencies block of our app module build.gradle.kts (Google, 2024).
1
2
3
4
5
6
7
dependencies {
    val composeBom = platform("androidx.compose:compose-bom:2023.10.01")
    implementation(composeBom)
    androidTestImplementation(composeBom)

    // ...
}
Now we can import the dependencies from Jetpack Compose that we need to build UI elements. For this, we’ll only be using the bare minimum libraries for the application to compile and display something on the screen. This way you have full control over the actual UI library you want to use eventually.
We’ll be needing the activity-compose library so we can use a Composable view inside our Activity (Google, 2023). And the compose.foundation library for basic UI elements.
1
2
3
4
5
6
7
dependencies {
    // ...

    implementation("androidx.activity:activity-compose:1.8.2")
    implementation("androidx.compose.foundation:foundation")

    // ...
Now execute a gradle sync and let’s create a new activity.
Create a new Activity
Now that we have our Jetpack compose set-up, we can create a new Activity where we can use Jetpack compose to display a text label. For this, we’ll be setting the text to Hello World as a check to see if we’ve set everything up correctly.
Create a new Activity in the src/main/kotlin/net.bartkessels.myapplication package called MainActivity.kt. I’ve used the Empty File option in the New context menu because I don’t want Android Studio to do some magic to set up the Activity.
Inside our empty MainActivity.kt we’ll define a class that will inherit from the ComponentActivity base class and override the onCreate method since that is the entry point of an Android class (Google, 2024).
1
2
3
4
5
6
7
8
9
10
11
12
// ...

override fun onCreate(savedInstanceState: Bundle?) {
    super.onCreate(savedInstanceState)

    setContent {
        BasicText(text = "Hello World!")
    }
}

// ...
Inside the onCreate method we call the onCreate method of the ComponentActivity and then run the setContent extension method to allow the rendering of a Composable component. In our case, that’s the BasicText component.
Register the MainActivity as the entry point
We have our MainActivity set up, now we need to tell Android that this activity is the entry point for our application. We do this by updating the AndroidManifest.xml inside the app module.
Inside the application tag we add a new activity tag with the name set to the location of our MainActivity. Because this activity lives in the root of our module, we can simply type .MainActivity where the . references the current root directory.
1
2
3
4
5
6
7
8
<activity
    android:name=".MainActivity"
    android:exported="true">
    <intent-filter>
        <action android:name="android.intent.action.MAIN" />
        <category android:name="android.intent.category.LAUNCHER" />
    </intent-filter>
</activity>
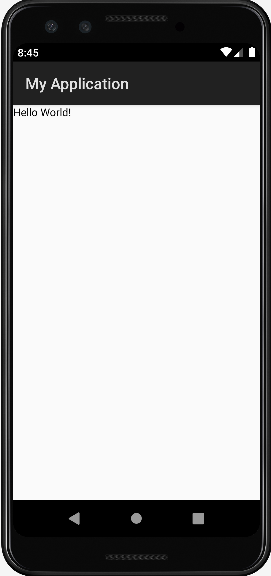
Run the application
Now that everything is configured, we can run our own application. The only thing you’ll see is a white screen with the text Hello World!. That’s all for your basic app. In the following posts, we’ll be updating this basic application to use a UI toolkit and make use of view models, so we can separate our view from the activity.
- The entire application can be found on github.com/bartkessels/basic-android-app
- Just the code that’s been created in this post can be found in the tutorial/setup-jetpack-compose branch
Categories
Related articles

Set up View Models with Jetpack Compose
You've just set up Jetpack Compose, but how do you properly separate the UI from the business logic? This i...

Set up Material Design with Jetpack Compose
You've just set up Jetpack Compose, and now you want to make your app look like a native Android app. This ...

Support multiple languages in your app
The user base for your application includes multiple nationalities, so why don't you update your app to all...

Enable UI preview in Android Studio
When developing an Android app, you're likely to iterate through multiple UIs. When going through this proc...